KC is a retired school teacher. She bought a nice little brick house in the village about 5 years ago. One of the first things she did to personalize her new house was to replace the front door. She picked out the front door herself, had it installed and then had a local woman paint it the color she wanted. The house already had a beautiful stamped concrete walkway and steps. The next few years brought inside improvements. Last year KC decided the front still needed something. It was a railing.
The Custom Railing Decision
The house never had a railing on the front steps. By code it didn’t need one. The steps were wide and only three steps high. But it was bothering KC. She wanted a railing. She discussed this with her handyman. He suggested a custom railing. That’s when KC called us. The only thing was, we already had two jobs lined up. It was going to be two weeks before we could get to her. That was fine because KC didn’t know what she wanted other than a custom railing, and something special if it was going to be custom. We gave her some homework in websites and catalogs to start the process. We also got a chance to study the front steps.
Two weeks later we returned with the beautiful Mandy Lu, Twisted Willow’s assistant and co-investor (the wife). KC had done her homework but still did not know what she wanted. Customers coming first, we suggested the cheapest alternative (which did not involve us), a railing assembly from one of the big box stores. KC was not interested in that. She wanted something special, but didn’t know what. This is what we love. Helping someone realize what they want and building it for them. What was my reply to KC? “I think you know, let’s go find out”.
I told KC I like to go to where the build will be installed and try to blend a concept with the area. We walked out to her front yard and looked at the steps and the front of her house. It took only 15 minutes to find out what KC was interested in. We needed a concept. I asked KC to tell me, without even thinking about it, what she liked the most about the front of her house. KC spoke up immediately. “That’s easy, the front door. I picked it out myself and had it installed”. I asked her what she liked about it, what originally caught her eye? “The leaded/stained glass design. I like it as much now as I did then”. At that point the beautiful Mandy Lu spoke up. She told KC we could duplicate that design for her balusters. KC asked if we could really do that. “Sure we’ll be back next week with a CAD presentation”. As we walked to the truck KC shouted out, “oh, I hate my house number sign too”. I told her we could cure that.
Fabricating a Custom Railing and House Number with an Exterior Design Them in Mind
We worked the Mandy Lu concept on the CAD software. Because of the area building codes we had to slim the original design to create balusters that were spaced no more than 4 inches apart. We also worked the design into the house number sign. The concept was a free standing railing attached only at two points, the first step and the landing. The house number sign used the same baluster concept design to tie it to the front of the house, bordering the number.
We returned a week later with our computer and CAD presentation. We sat down with KC and went through the plans. Before we were done KC told us that was what she wanted. I told her I wasn’t done yet. She didn’t care, that was what she wanted. I told her I had some other ideas. She didn’t want to know, this railing was what she wanted.
So we made KC a railing and house number sign. We made cut files from our CAD files and had Hal (our CNC plasma table) cut out the designed parts, balusters and sign parts. Hal also cut out three different end scroll sets, a finishing touch for the railing from which KC could choose. Measurements taken from the front steps were carefully applied to the railing build. All welds were blended to make the railing look like one cast piece. The decision was made to make KC’s house number sign two layers with our own hanging system (no visible mounting hardware).
-
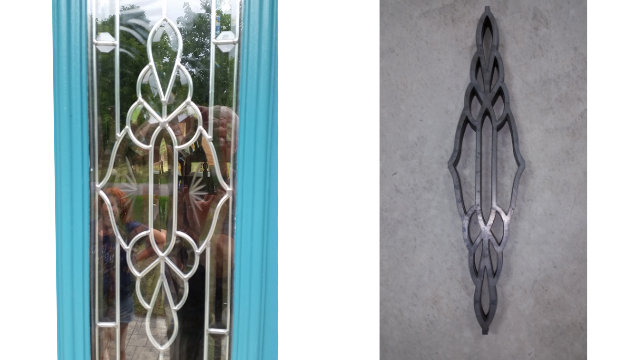
- The door design and matching custom railing cuts
-
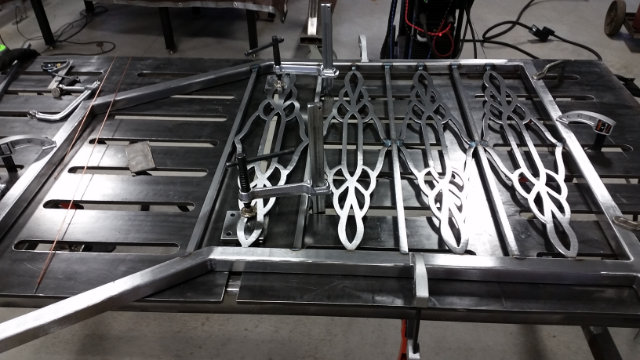
- The custom railing coming together
-
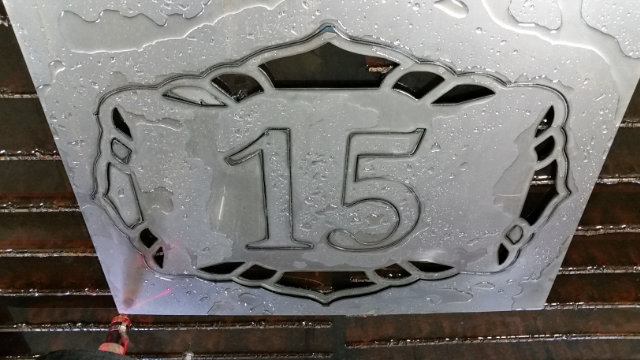
- Hal cutting out the custom house number
-
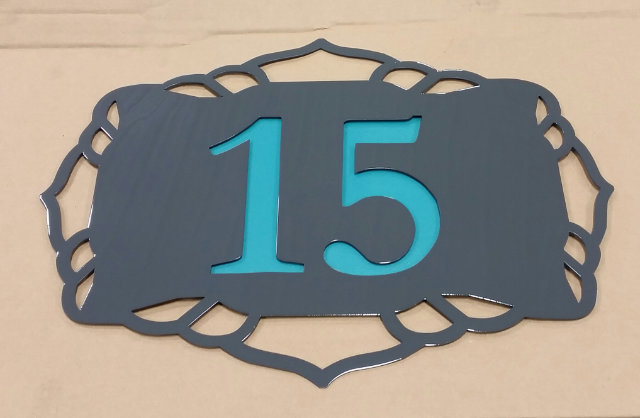
- Finished custom house number
-
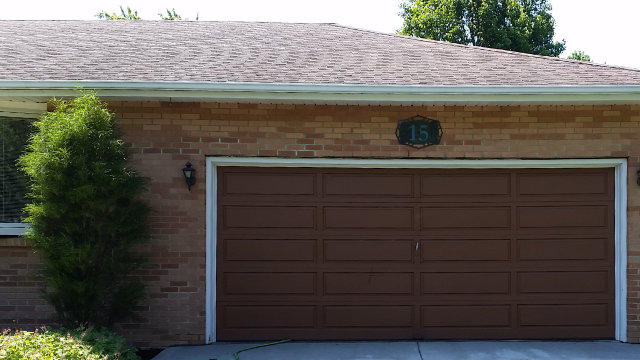
- The installed custom house number
-
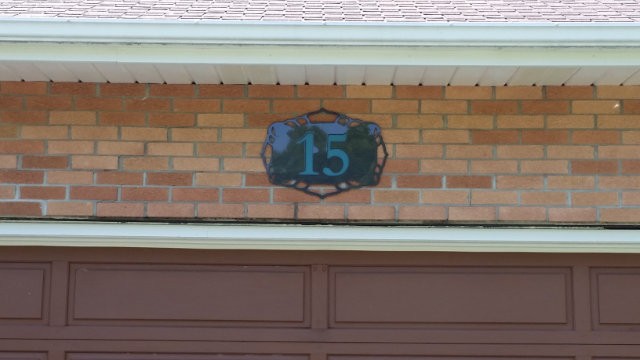
- Custom house number close up
-
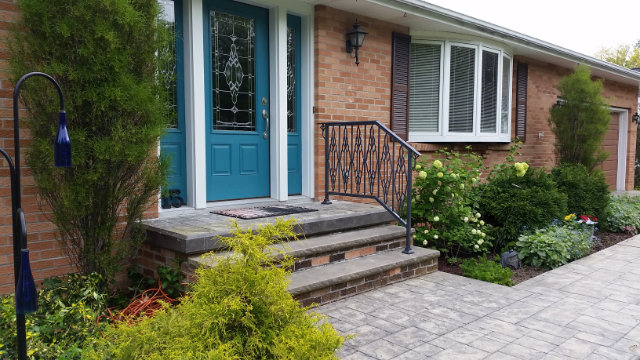
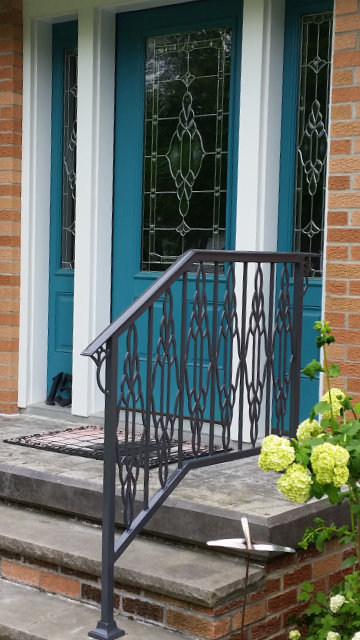
- The installed custom railing and exterior design theme
The front of the sign was painted the same color as the railing and the second layer (the house number color) was painted the same color as the front door.
The house number sign has a ¼” space between layers and can be taken apart for repair or color change. Both railing and sign are built to last a lifetime………or two. KC wanted the railing a dark gray. We painted the railing and house number sign a dark gray Axalta Imron polyurethane DTM. Installation went perfectly. As we left the job KC shouted out, “I hate my mailbox post”. I told her we could cure that.
KC sent us a text, “I love love love my railing and sign”.